

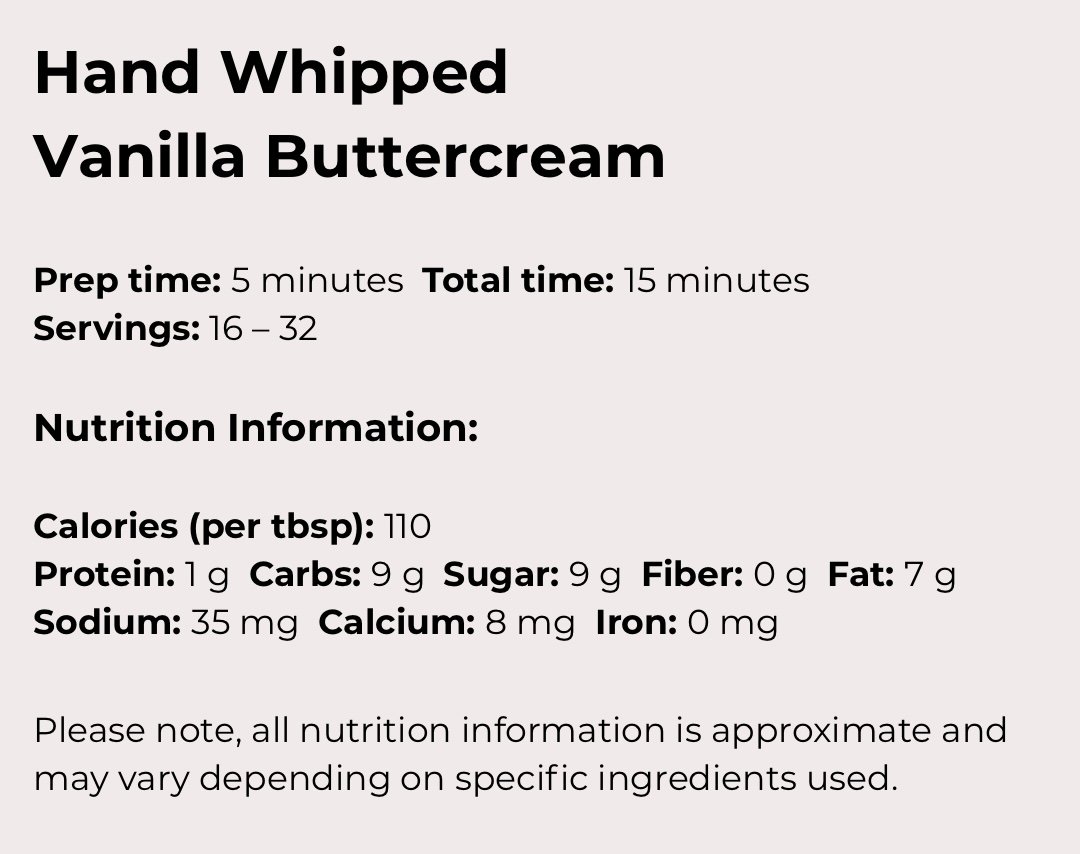
Hand Whipped Vanilla Buttercream
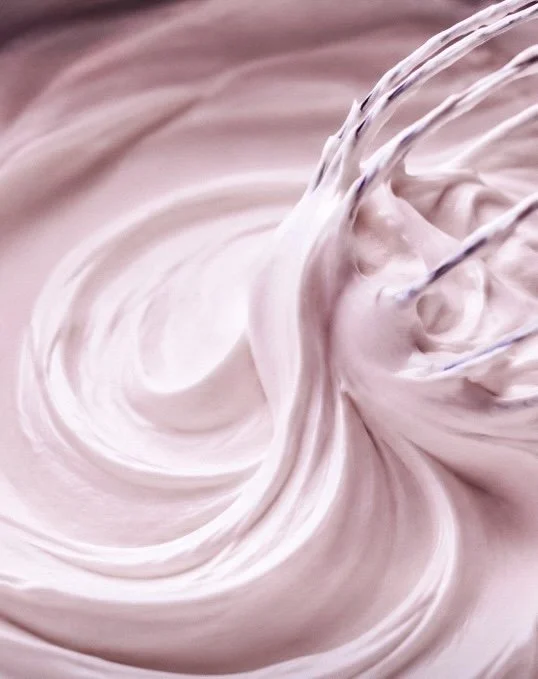
It’s been almost one whole year since I started my food and lifestyle blog, and I figured it’s about time I dedicate some love for the food portion of it. Buttercream counts as food, right? Whatever, Karen, it’s here and you can catch me in my kitchen eating it by the spoonful. I’m going to be honest though, I had originally planned on my first recipe post to be cake, but I had so many requests for the buttercream and figured, what is cake without the frosting?
Now, you might be thinking, “What is frosting without an electric mixer?” Not to worry! Growing up, my mom rarely ever used an electric mixer. I think she liked knowing that if there was ever a time where electricity wasn’t available, she could still make an exceptionally good frosting. Through this, I quickly learned that good quality buttercream can be made without a mixer and it’s actually pretty easy. It also doubles as a great arm workout, which gives you all the excuses to eat it by the spoonful like I do. However, if you wish to use an electric mixer for this recipe, all the power to you (literally).
Let’s get mixing!
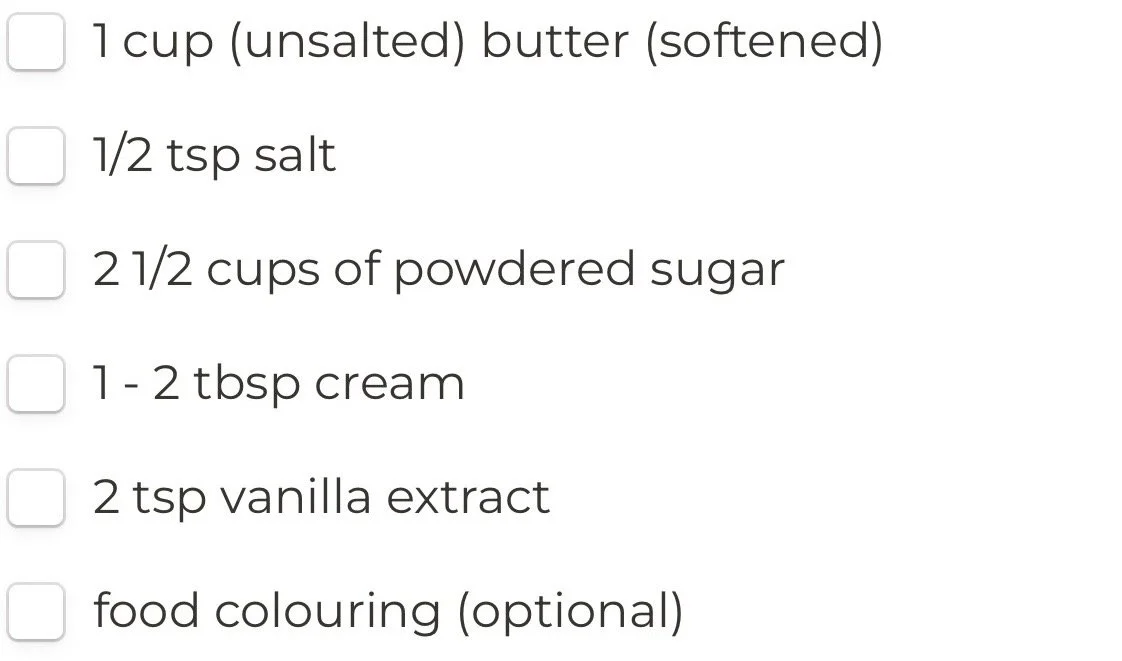
Ingredients:
Directions:
In a medium sized bowl, whisk softened butter and salt together until well combined (about 5 mins). If you don’t have unsalted butter, you can use salted, then just wait until the end to add in any additional salt to taste. I prefer to use unsalted butter to allow for more control over the salt added. However, either will work.

Sift in powdered sugar, 1 cup at a time, up to 2 1/2 cups. Whisk until it resembles a thick batter.

Add in cream 1 tbsp at a time until desired consistency. If you don’t have cream, milk will suffice.

Add in vanilla extract and continue whisking until light and fluffy (about 5 mins).

If you want a thicker buttercream, sift in more powdered sugar, starting at 1/4 cup at a time up to desired taste / consistency.

Add food colouring of choice (optional). I went in with a touch of violet by Lulu’s natural food colouring to offset the natural yellow hue from the butter.
Last (but not least), give your buttercream a generous taste and top onto your favourite cake (or cupcakes, cookies, etc). I topped mine onto a homemade classic vanilla cake (recipe coming soon).
Note: You may also make this ahead of time and store in the fridge for up to 4 days, followed by re-whisking just before you are ready to use. You can also freeze for up to 2 months if you’re planning way ahead of time.
I hope you all enjoyed my first recipe on here. For a quicker digestion, I will be posting a shortened version of this recipe on my reels this evening.
What kind of cake would you top with this buttercream? Let me know in the comments below or on Instagram @haveyour.c.a.k.e
Xoxo