

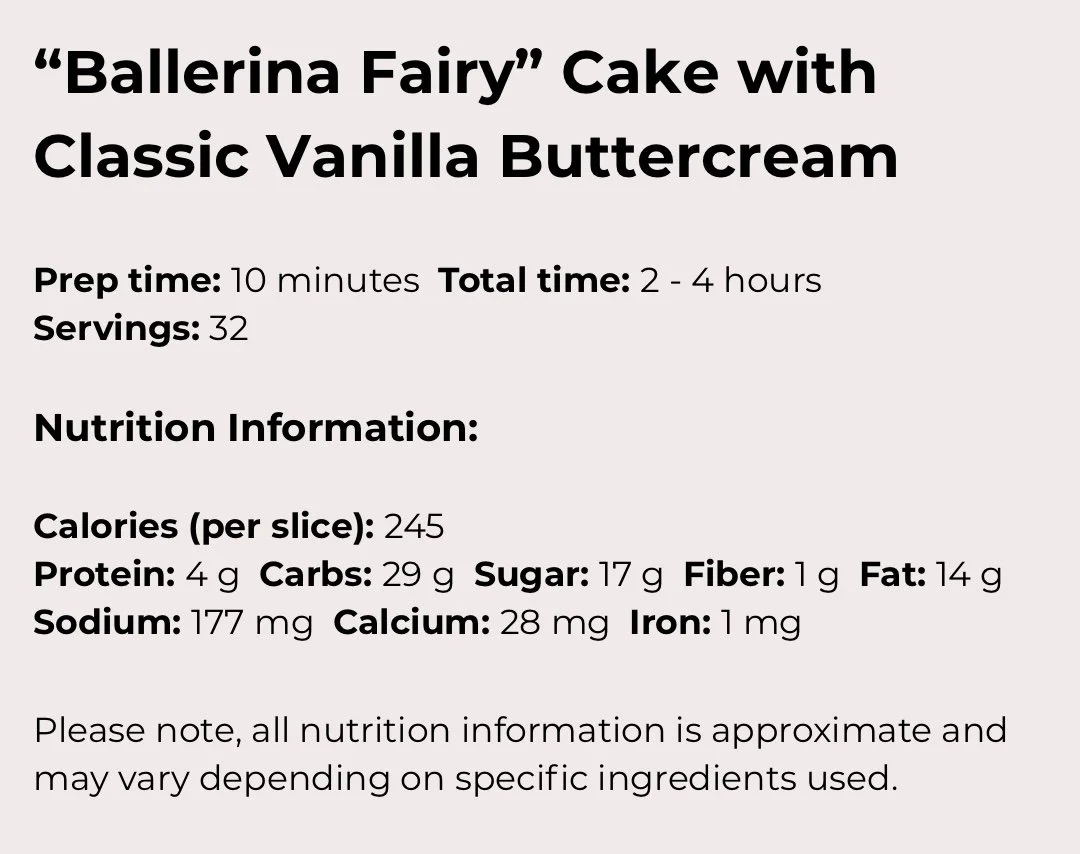
“Ballerina Fairy” Cake with Classic Vanilla Buttercream
As some of you may remember, the very first recipe I ever shared on my blog was Hand Whipped Vanilla Buttercream, but after eating it by about the 10th spoonful, I figured I should probably post a cake recipe to go with it. That’s when my Classic Vanilla Cake recipe dropped for the first time, and I’m pleased to say it’s held up quite well over the years and is still my go-to for birthday occasions. As for the cake shown above, well, I can’t say it held up well in the beginning, considering one of the layers fell apart. However, thanks to the thickness of the buttercream, I was able to fix it up without any further issues.
Anyway, to celebrate my daughters’ birthdays (and my frosting’s troubleshooting abilities), I figured I would share the final product. The key differences I made in this particular cake (besides one layer falling apart) is doubling the ingredients of my Classic Vanilla Cake recipe and using a Kitchen Aid mixer to give my hands a break. Complete with the finishing touches to make it unique from the original recipe, this cake provides more layers, more colours, and a little dash of cake decor to top it all off.
Let’s get mixing!
Ingredients:
For the cake:

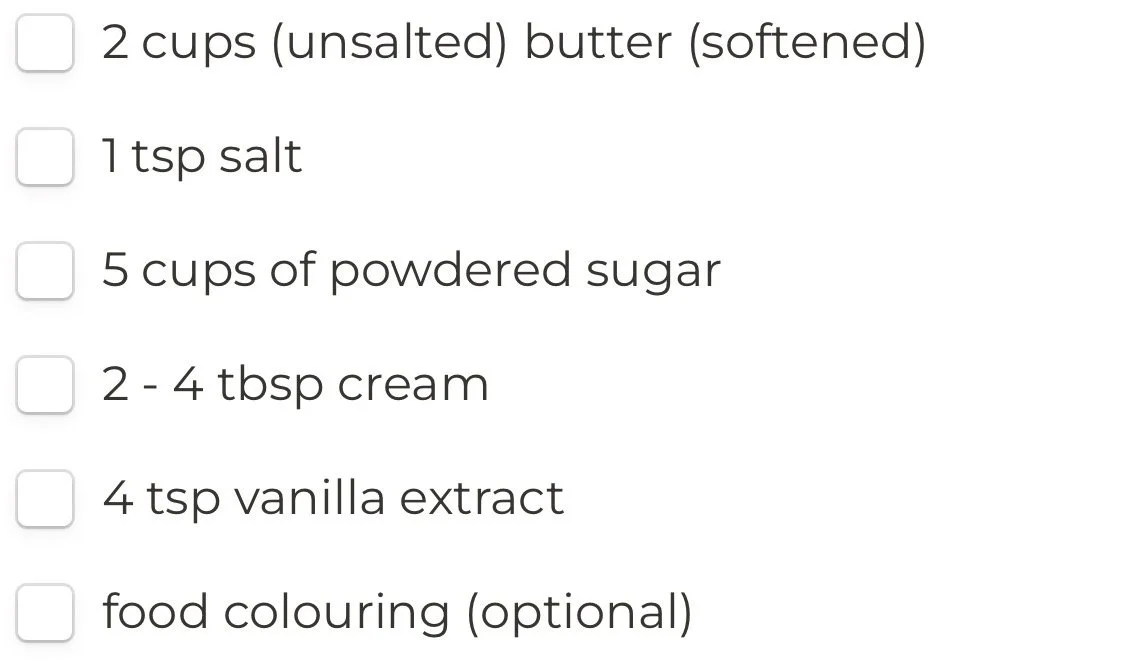
For the buttercream:
Directions:
Preheat oven to 350
Cream softened butter and sugar together until light and fluffy.
Mix in eggs, one at a time.
Measure cream (or milk). Then add 1/2 tbsp lemon juice (optional), stir and let sit for 5 mins. This is to mimic buttermilk for a more tender cake. The lemon juice doesn’t make the cake taste like lemon, and adds just the right amount of acidity for the milk. You can also use buttermilk instead of the lemon and cream if you have it or prefer it.
Add in cream (or milk), followed by vanilla. Mix well.
Sift in 2 levelled cups of flour, then add baking powder and salt. Mix until thoroughly combined.
Pour batter into four medium greased cake pans, filling just under halfway. If you’re wanting fewer layers cake, just use larger cake tins instead.
Bake for 30 mins (or until knife comes out clean).
Remove from oven and allow to sit for 5 mins, then transfer to cooling racks until cakes reach room temp.
Place cake in a tin or on a plate, then refrigerate for at least half an hour before frosting. Note, if you don’t plan to frost until the next day, you can leave it in the fridge until you do. You can also freeze the cake for up to 2 months before and/or after frosting if you’re wanting to prep way ahead of time. Once done, this cake can stay in the fridge for up to 4 days or frozen for 2 months.
While cake is in the fridge, prepare buttercream by whisking softened butter and salt together on low speed until well combined.
Sift in powdered sugar, 1 cup at a time, up to 5 cups. Whisk until it resembles a thick batter.
Add in cream 1 tbsp at a time until desired consistency. If you don’t have cream, milk will suffice.
Add in vanilla extract and continue whisking until light and fluffy (about 5 mins).
If you want a thicker buttercream, sift in more powdered sugar, starting at 1/4 cup at a time up to desired taste / consistency.
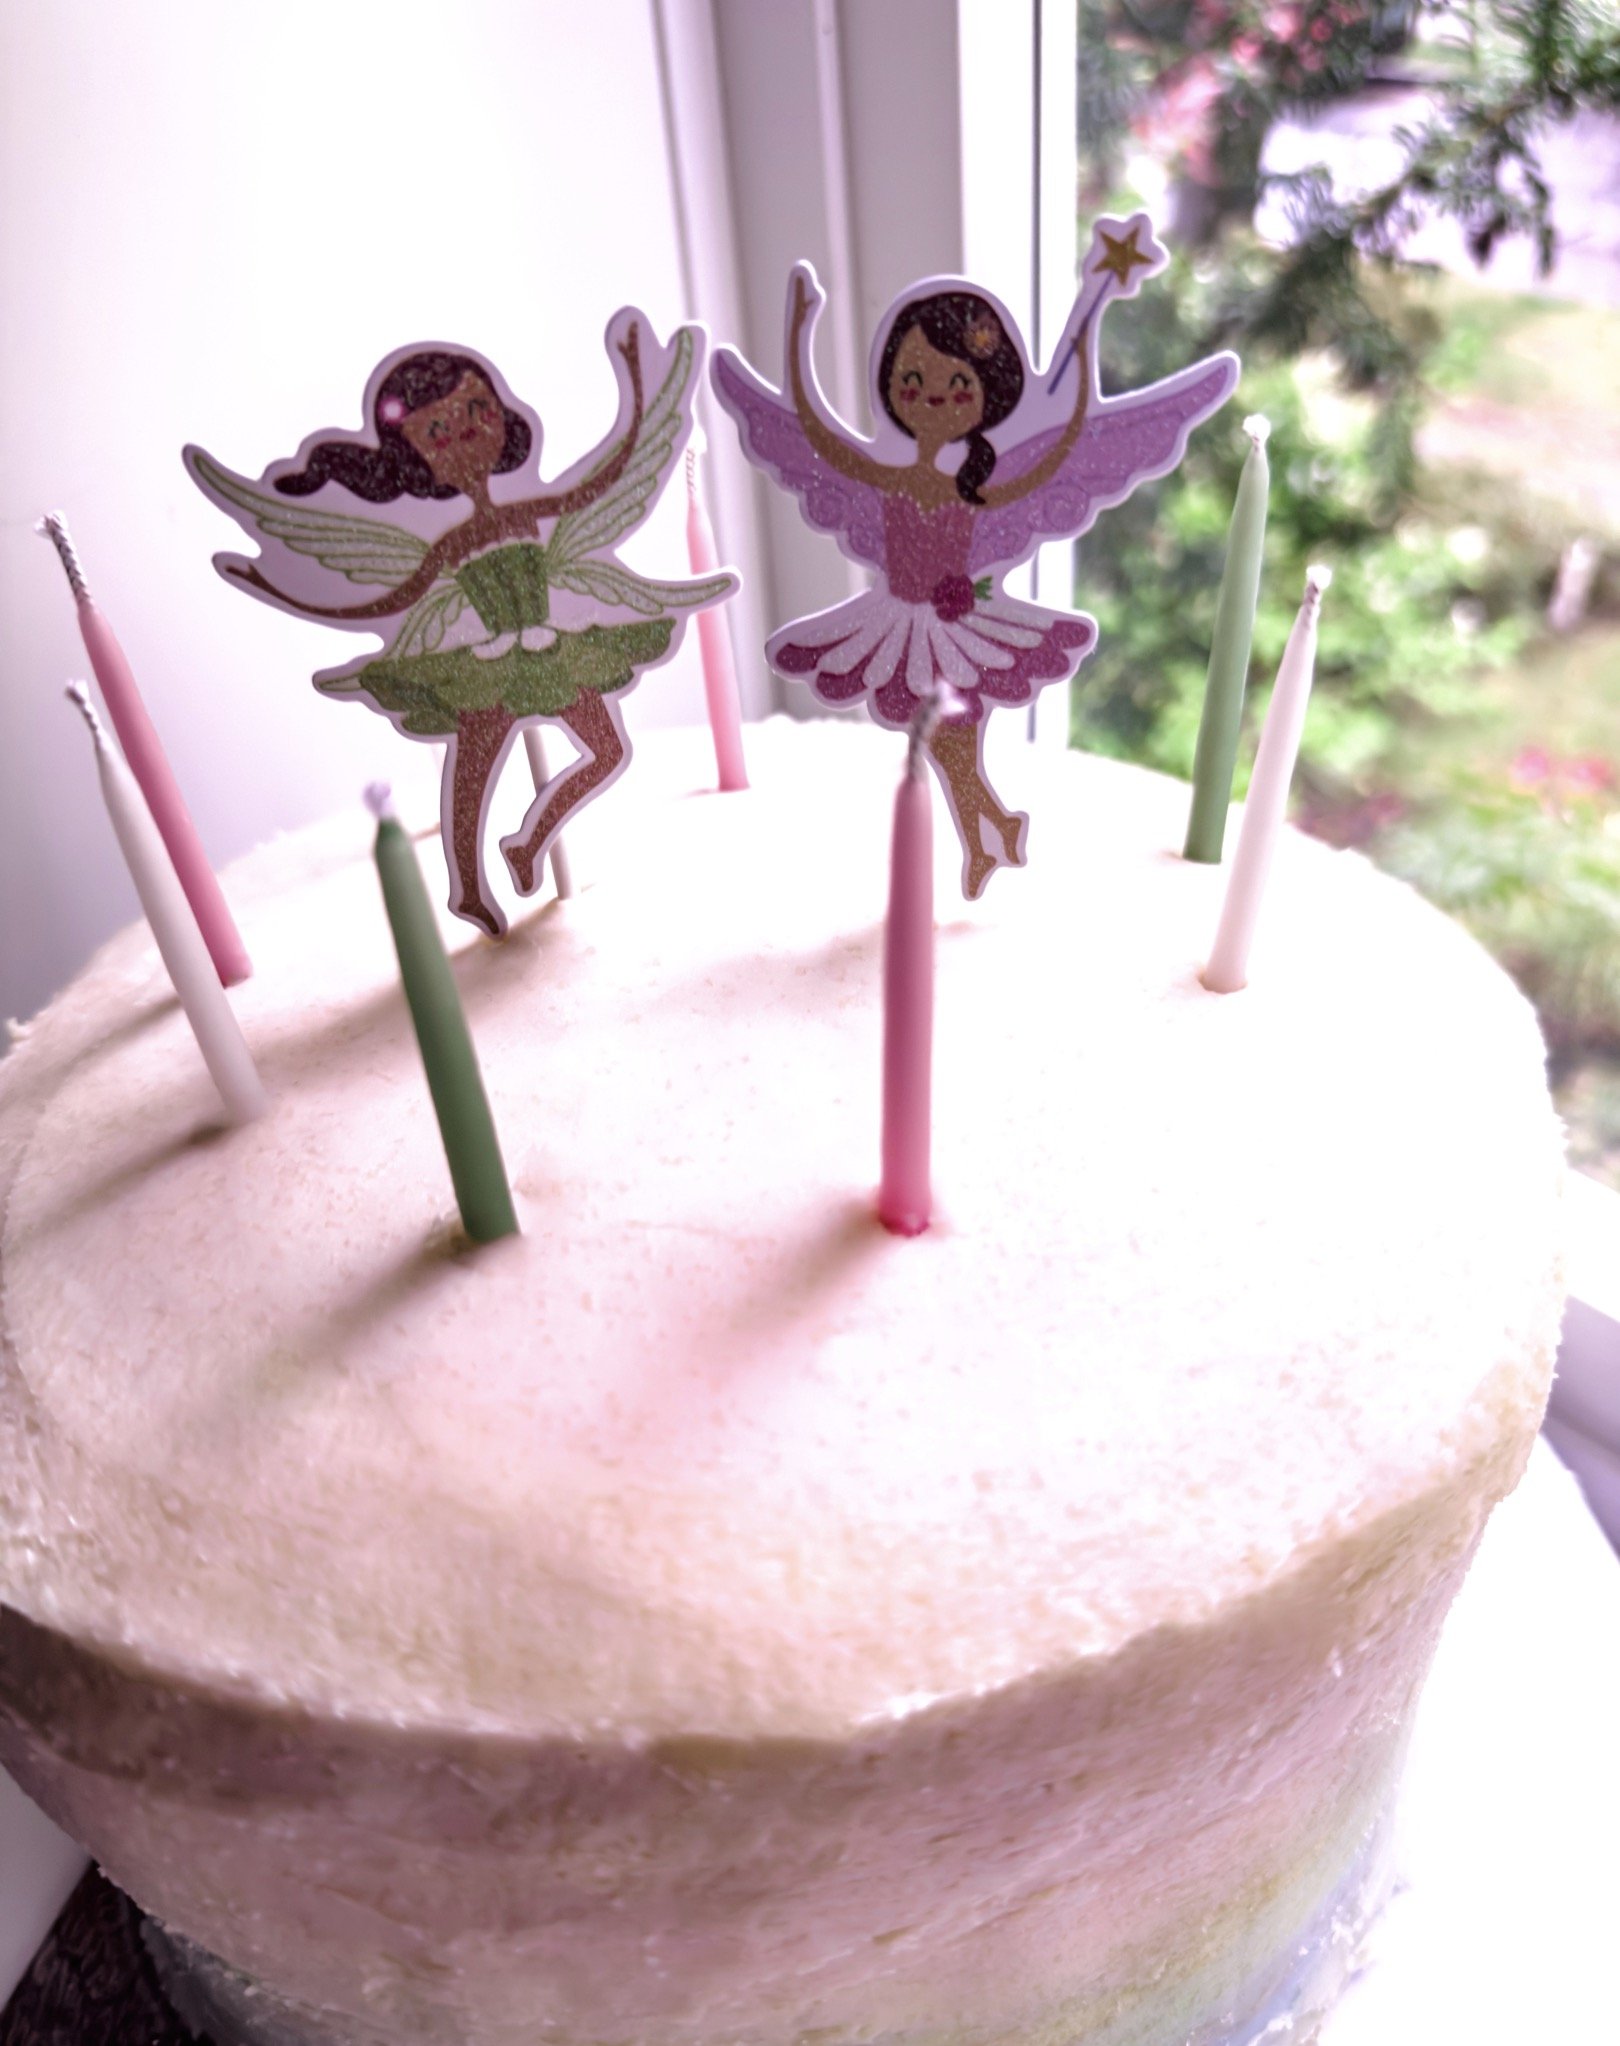
Add food colouring of choice (optional). I went in with four separate colours for each layer to create a colourful ombré effect.
Once cake is cooled, cut and shape (optional). I prefer to do this, because it makes for a “cleaner” looking cake, but it’s not entirely necessary.
Top cake with buttercream and decor of choice. As requested by my daughters’, I used some “ballerina fairy” cake toppers (shown above) that I ordered from Etsy.
Slice, serve, and indulge in double the cake!
Hope you all enjoy this take on my Classic Vanilla Cake recipe! For further notes and step by step photos, you can find the original recipe on my blog under the “Recipes” category.
Xoxo